
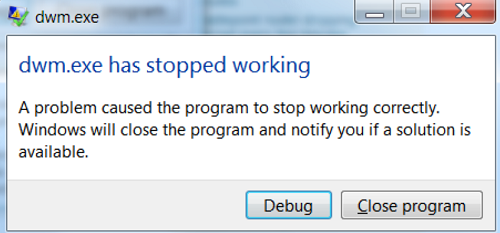
So, you are getting DWM.EXE error when booting your PC or starting a program in Windows 11, 10 or 8 based operating system. You see a gray screen/black screen with the following message, and you don’t know how to deal with this error.
The Application was unable to start correctly (0xc0000142). Click OK to close the application.
In this situation, don’t get panic and don’t look for a professional to help you. If you know little about Windows 11/10/8 OS, you can fix it yourselves. In this article, I am presenting steps by steps guidelines to solve your issue. Later if you get an additional driver error like “Code 3 – The Driver for This Device Might be Corrupted” or “Error 1067: ‘The process terminated unexpectedly’“, then go to the article to fix them seperately.
What is DWM.EXE file and is it safe?
Before moving next, you must know little about DWM.EXE process. DWM stands for Desktop Windows Manager, and it is an essential process for Windows Operating System. This process does smooth animation, transparency, Icon customization, Aero customization etc. The DWM.EXE file is a core windows process and strongly connected with Windows File Manager.
Why DWM.EXE error occur?
If you are getting this error, it means this executable file gets damaged or corrupted due to virus/trojan/malware or due to installing incompatible software on the PC. Apart from it, hardware failure like damaged hard disk, ram, or other components may also throw this error on the screen.
As mentioned above that this error may occur due to several reasons, so some of the best and useful fixing methods are mentioned below. Not only hardware failure but there might some configuration issues on your PC that are throwing the DWM.EXE error.
Method 1: Fix Using DriverEasy Driver Repair Tool
Most commonly this error occurs when you attach a USB device or gaming controller to the PC, but the correspondent drivers are not installed. Apart from it the outdated drivers or outdated Windows updates may also trigger this issue. In this situation, you must run the DriverEasy to scan and repair the driver-related issues on your PC.
 3 Steps to Fix this Error
Step 1. Download DriverEasy - Driver Repair Tool
[Trusted by 50 Millions+ Download] | Windows 11/10/8 Supported
1 PC3 PC - $29.95 Offer
Step 2. SCAN your Windows PC
Step 3. Update all your missing, outdated or damaged drivers.
 Over 18 Million Drivers Available to Download.
- Install, Scan and Update all your drivers.
-
Supports Windows 11, 10, 8, 8.1, 7 & Windows Server.
-
Uses Advanced Hardware-matching technology to detect all your connected hardware and devices.


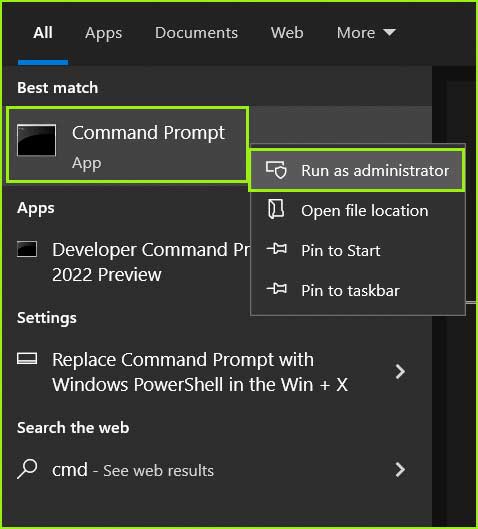
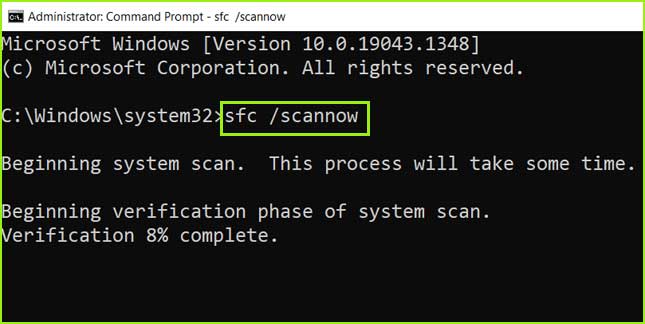
Method 2: Repair Windows System Files
This is one of the essential methods that you need to try when fixing any Windows problems. Repairing Windows System Files using the System File Checker tool is an easy process and you can perform this task just by running a single line command on the command prompt.
sfc /scannow
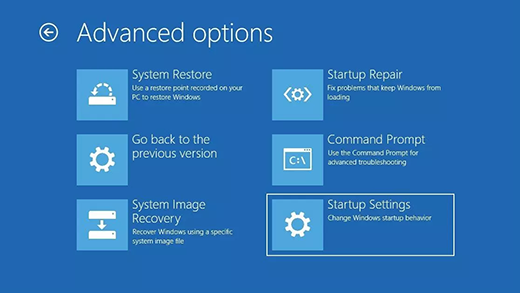
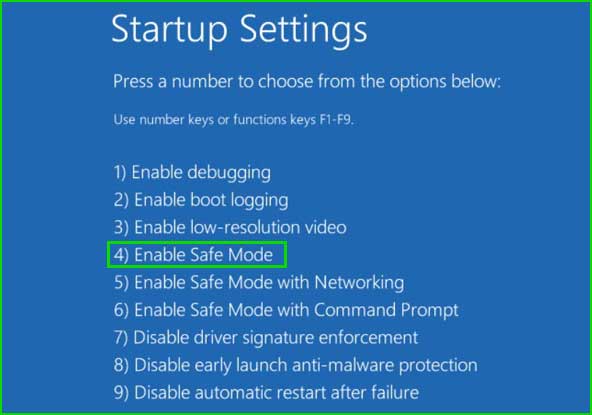
Method 3: Start Windows in Safe Mode and disable all the third-party services and processes.
If you are unable to start Windows due to this error, then simply start Windows in Safe Mode and then disable all the third-party services and processes, and then start Windows in the Diagnostic Mode.


Method 4: Run Disk Checking Tool
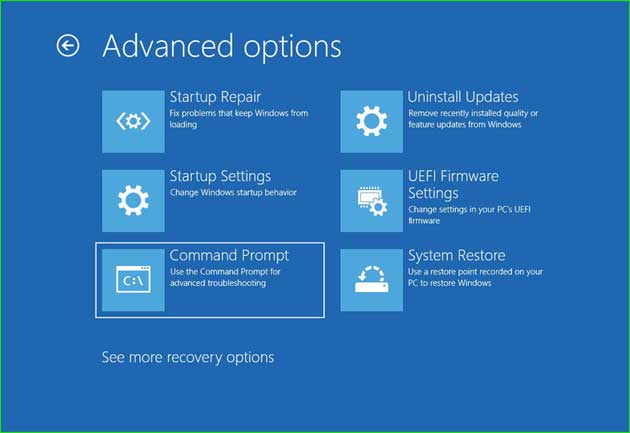
There may be damage in your disk space, so you are getting the DWM.EXE error on Windows 10/11. You just need to open Elevated Command Prompt and run the disk checking command. If you are unable to boot your PC, do the following steps.
chkdsk c: /r /x
Summary
In this article, I have explained four methods to fix dwm.exe – Application Error on Windows 10/11 machine. You can apply the above trick to resolve the problem.